Hambini Threaded Bottom Bracket Installation Instructions (BSA, Italian, T45, T47)
Introduction
This installation sequence covers Hambini threaded bottom brackets.
Tools required:
- Appropriate Hambini Threaded Installation Adaptor. 6805 Based or 6806 Based.
- 32mm Socket or Wrench and Spanner
- Threadlock for Italian Bottom Brackets
Installation Sequence
- Ensure all surfaces are clean and free from debris, dust and grease. Do not apply grease to the delrin end caps.
- Ensure all threads are in good condition and have not been deformed. It is advisable to re-tap the threads to remove all residual threadlock or sealant from previous installations.
- Ensure the bottom bracket faces are completely square and the faces have a maximum axial runout (axial deviation) of 0.02mm. This is commonly called facing a bottom bracket. Please see the dedicated section below.
- Insert the bottom brackets into the bike and tighten them. The direction of tightening is as follows:
- Italian threaded – Both the drive side and non drive side are right hand threaded. They screw in clockwise. It is advisable to apply threadlock during installation to the drive side to prevent the bottom bracket unscrewing itself in operation.
- BSA, T45, T47 – The drive side is a left-hand thread; it screws in counterclockwise. The non-drive side is a right-hand thread; it screws in clockwise.
- The recommended Torque settings are shown below
| Bottom Bracket Type | Torque (Nm) | Thread Size | Comment |
|---|---|---|---|
| BSA Shimano | 18 | 1.37″x24TPI | |
| BSA DUB | 8 | 1.37″x24TPI | |
| BSA 30mm | 8 | 1.37″x24TPI | |
| Italian Shimano | 18 | M36x24TPI | Apply Threadlock to Drive Side |
| Italian DUB | 8 | M36x24TPI | Apply Threadlock to Drive Side |
| Italian 30mm | 8 | M36x24TPI | Apply Threadlock to Drive Side |
| All T47 | 18 | M47x1.0mm | |
| All T45 | 18 | M45x1.0mm |
- All Hambini Bottom brackets require approximately 250km of riding to bed in, they may feel slightly notchy or jittery before bedding in and this may vary from side. THIS IS NOT A FAULT This applies to full and non contacting seals but is more noticeable on full contact seals.
Bottom Bracket Facing
Bottom bracket facing is a key requirement to the reliable functioning of a bottom bracket, Since the advent of carbon frames, there has been a propensity for the area around the bottom bracket to be irregular. It is imperative to ensure that the area is flat otherwise, the bottom bracket can flex, which will reduce power transfer and over time, may cause fatigue failure. This is especially important with small format Bottom bracket frames using a large axle (i.e. BSA and Italian frames using DUB and 30mm axles). Due to the size limitations, this combination results in extremely thin side walls for threading.
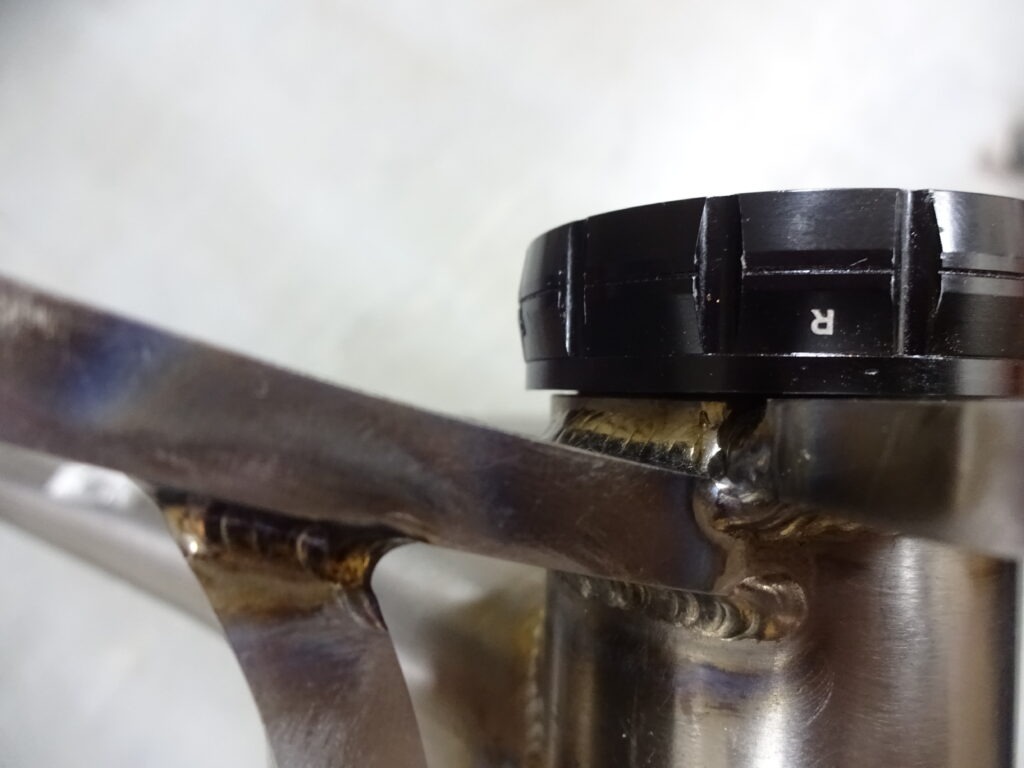
The photograph below shows a typical unfaced bottom bracket

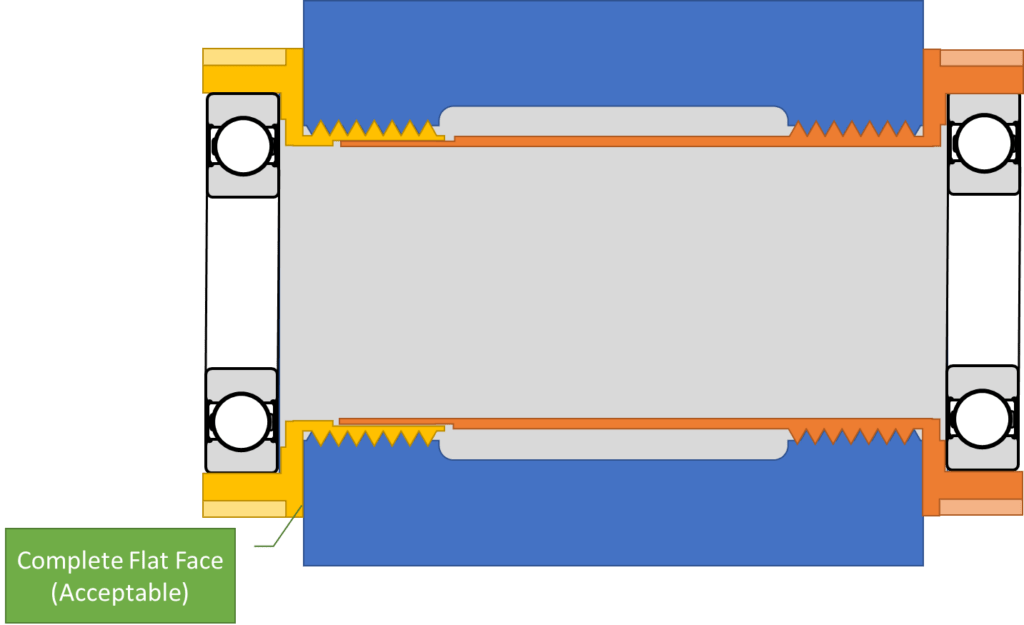
The schematic below shows the ideal bottom bracket installation. Both sides of the bottom bracket are supported on full face flat surfaces.

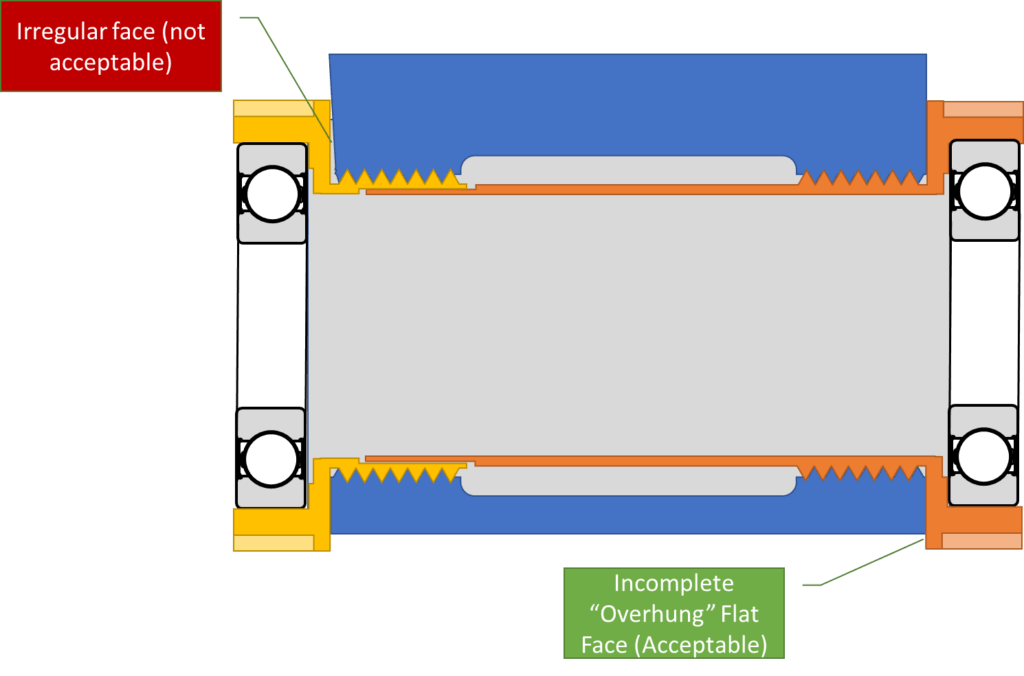
The diagram below shows two scenarios, an irregular face that has point contact, the face is concave. This is unacceptable as it will cause the bottom bracket to flex. The bottom half of the diagram depicts a common scenario where the cups overhang the bottom bracket of the bike frame. Although not ideal, this is acceptable as the faces are still flat.

