Hambini Pressfit Bottom Bracket Installation
Introduction
This guide takes you through the fitting process of a Hambini Bottom Bracket. It supplements a video guide which is available below. I recommend you familiarize yourself with both before purchasing a Hambini Bottom Bracket. If you have any questions, please e-mail me and I will be on hand to answer them. support@hambini.com
Hambini Bottom brackets are much stiffer than any other bottom bracket that is commonly available, please install with caution to avoid damaging your bike frame. Hambini will not be liable for any frame damage caused by the installation of a Hambini BB
Crankset compatibility
- Shimano – all hambini BB’s are a direct drop-in for Shimano Hollowtech 2 systems.
- BB30 Extended / BB386 – Hambini BB’s place the bearings at a nominal 90.5mm spacing. If your axle length is shorter than this, it will not work. Hambini BB30 extended BB’s ARE NOT SUPPLIED WITH SHIMS. You may need some BB30 shims to take up any free play. It is impossible for this guide to cover every incarnation of BB30 and BB30 extended as there are many variations in the marketplace.
- SRAM GXP – Please see the dedicated section below.
- SRAM DUB – Please see the dedicated section below
Installation Video
The videos below shows you how to install a Hambini Bottom Bracket, there are some subtle differences between each bottom bracket depending on the application but the overall principle remains the same. Please view these in conjunction with the text below. The Text below always takes precedence as it’s up to date. YouTube does not allow videos to be updated once uploaded
This video shows a Hambini BB86 bottom bracket being installed in a Winspace bike frame.
Pre-Requisites
All Hambini Bottom Brackets press in from the drive side (chain side) of the bike frame. They are designed in this way to maintain an accurate chainline that is within manufacturer (Shimano, SRAM etc) tolerances. The following need to be observed:
- The bottom Bracket hole needs to be free of obstructions, usual obstructions are Di2 wires and bolts holding cable guides and internal steps
- The fitting tools that come with Hambini BB’s are designed to be used with M12 studbar or presses. M12 or 1/2″ studbar and nuts are acceptable, a press makes the job easier. Note: Park Tools professional press is approximately 16mm in Diameter and would require the Hambini adaptors to be drilled.
- The usual respect for wearing safety equipment applies.
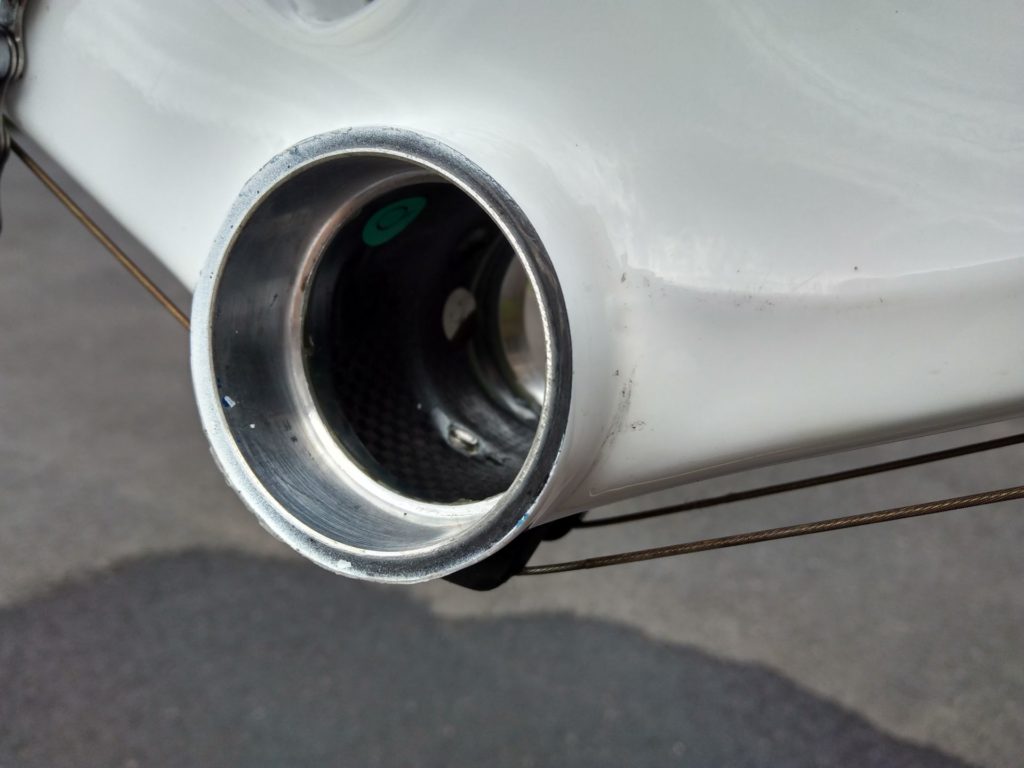
- Any double-lipped bottom bracket holes are unsuitable, this is usually only older model BB86 bike frames that have this issue, BB30/BB30A/PF30/PF30A/BBright usually meet this requirement. The picture below shows a double-lipped bottom bracket, note the lip approximately 10mm into the bottom bracket shell
Mechanical Overview and replacement parts
All Hambini Bottom brackets have the same mechanical methodology. They consist of a one-piece sleeve that is made of aluminium or a proprietary alloy, a pair of bearings and Delrin spacers/sleeves. The bottom brackets use standard-sized bearings which are designed to be replaced as and when they wear out. The bearings that are used are shown in the table below. The choice of bearing is dictated by the bottom bracket shell and not the crankset
| Bottom Bracket Type | Bearing Type | Notes |
|---|---|---|
| BB30 | 6805 | |
| BB30A | 6805 | |
| PF30 | 6806 | |
| PF30A | 6806 | |
| BBright | 6806 | |
| BB386 / BB386 EVO | 6806 | |
| BB86 | 6805 |
If you have a custom hambini bottom bracket, please contact me and I will advise
Pre-Installation
It is highly recommended that the crankset is tried in the bottom bracket cartridge before the cartridge is inserted into the bike frame. Any issues with shimming can be identified at this stage rather than when the cartridge is in the bike frame.
Please ensure you measure the bottom bracket hole in the bike before installation. Hambini BB’s are designed to fit into published specifications and fitting the Bottom Bracket into a frame that is out of specification can lead to diminished performance or frame cracking. Sizes for apertures are as follows:
| BB Type (mm) | Minimum Hole Diameter (mm) | Maximum Hole Diameter (mm) | Ideal Hole Diameter (mm) | Maximum Radial Runout (mm) |
|---|---|---|---|---|
| BB30, BB30A BB30A83 | 41.97 | 41.99 | 41.98 | 0.01 |
| BB86 | 40.95 | 41.00 | 40.97 | 0.01 |
| BB92 | 40.95 | 41.00 | 40.97 | 0.01 |
| BB386EVO (Often referred to as BB386) | 45.95 | 46.00 | 45.97 | 0.01 |
| BB Correct (Factor) | 45.95 | 46.00 | 45.97 | 0.01 |
| BBright (Cervelo) | 45.95 | 46.00 | 45.97 | 0.01 |
| PF30, PF30A, PF30A73, PF30A83 | 45.95 | 46.00 | 45.97 | 0.01 |
The following bike frames often need whiffling (see troubleshooting):
Cervelo, Factor, Ridley, Canyon, Cannondale, OPEN, Argon 18, Giant
Installation Method
- Make sure any Di2 wires, front mech cables and brake cables will not impinge on the installation of the Hambini Bottom Bracket. You should be able to see straight through the hole. YOU MUST MEASURE THE BOTTOM BRACKET HOLE, IF IT IS UNDERSIZED, you will have poor performance and potentially cause damage to your frame. Fixing Undersized bottom brackets is detailed here
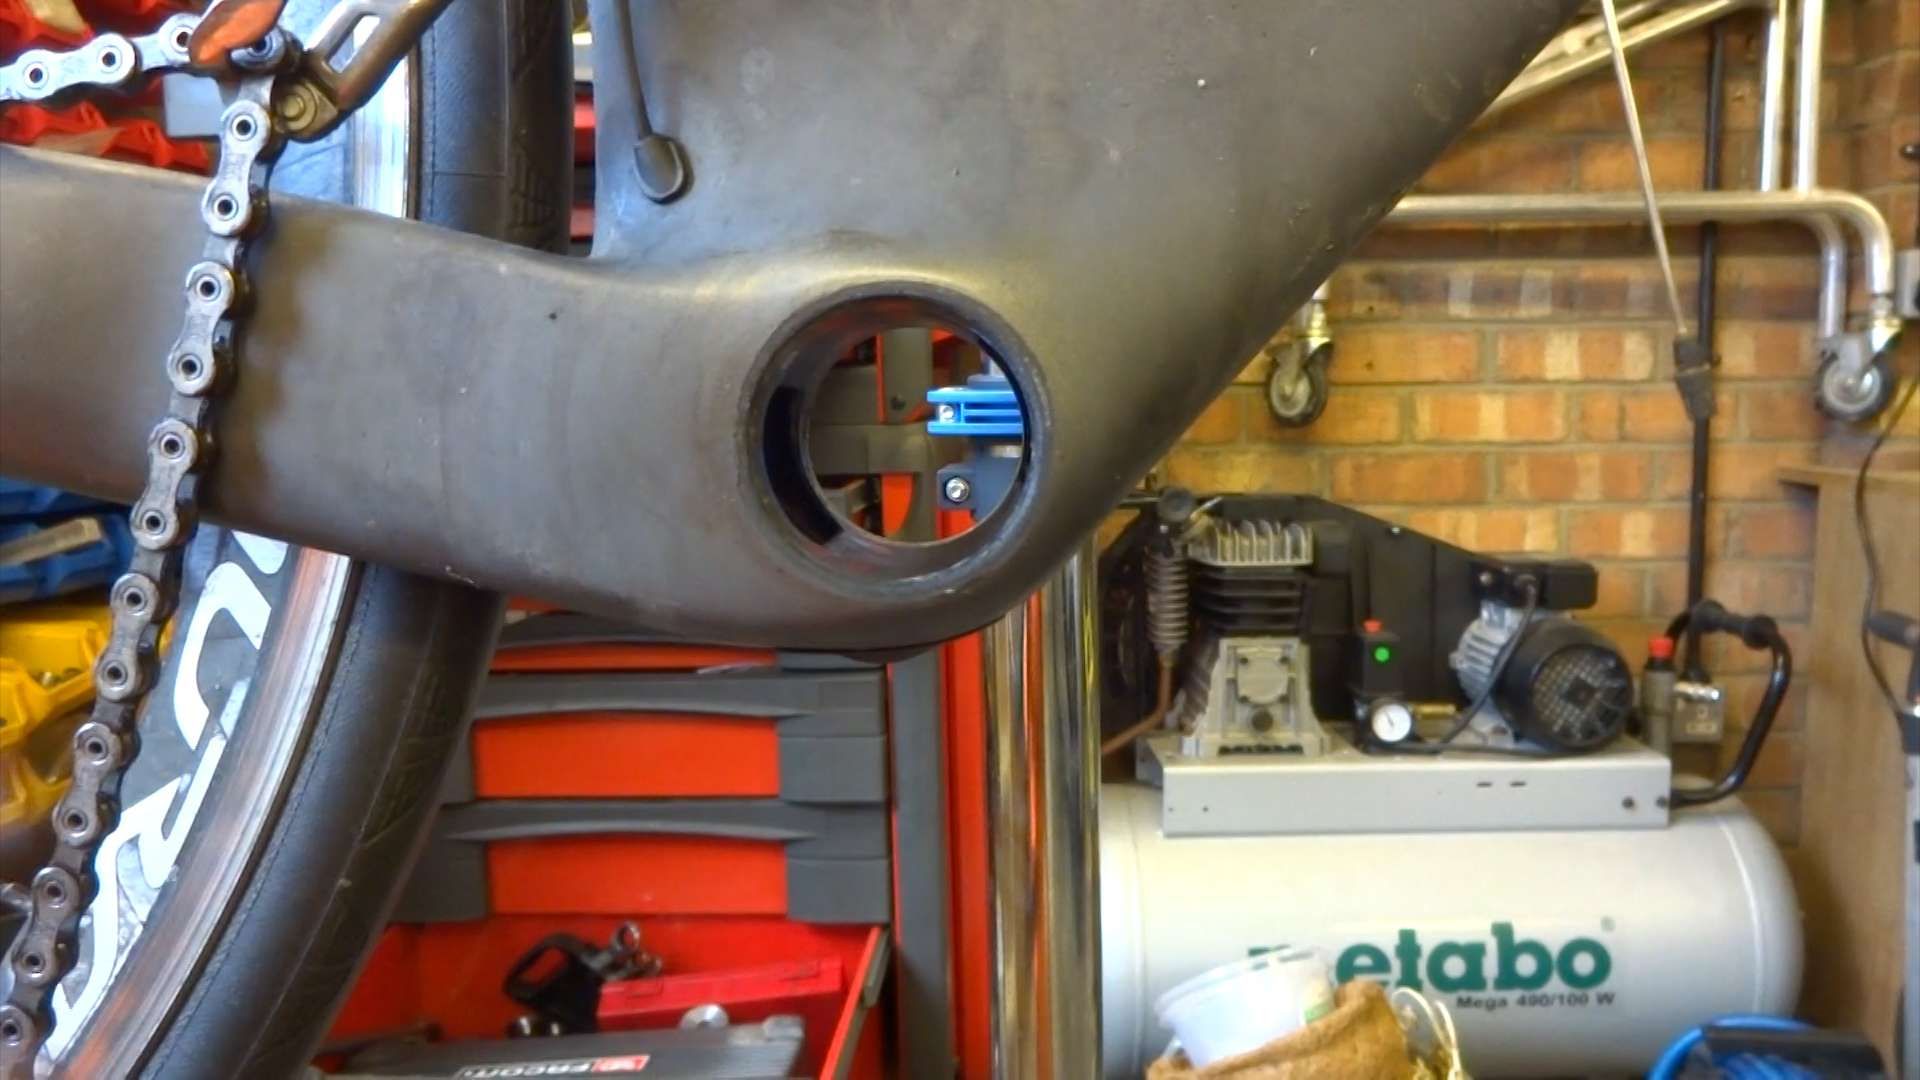
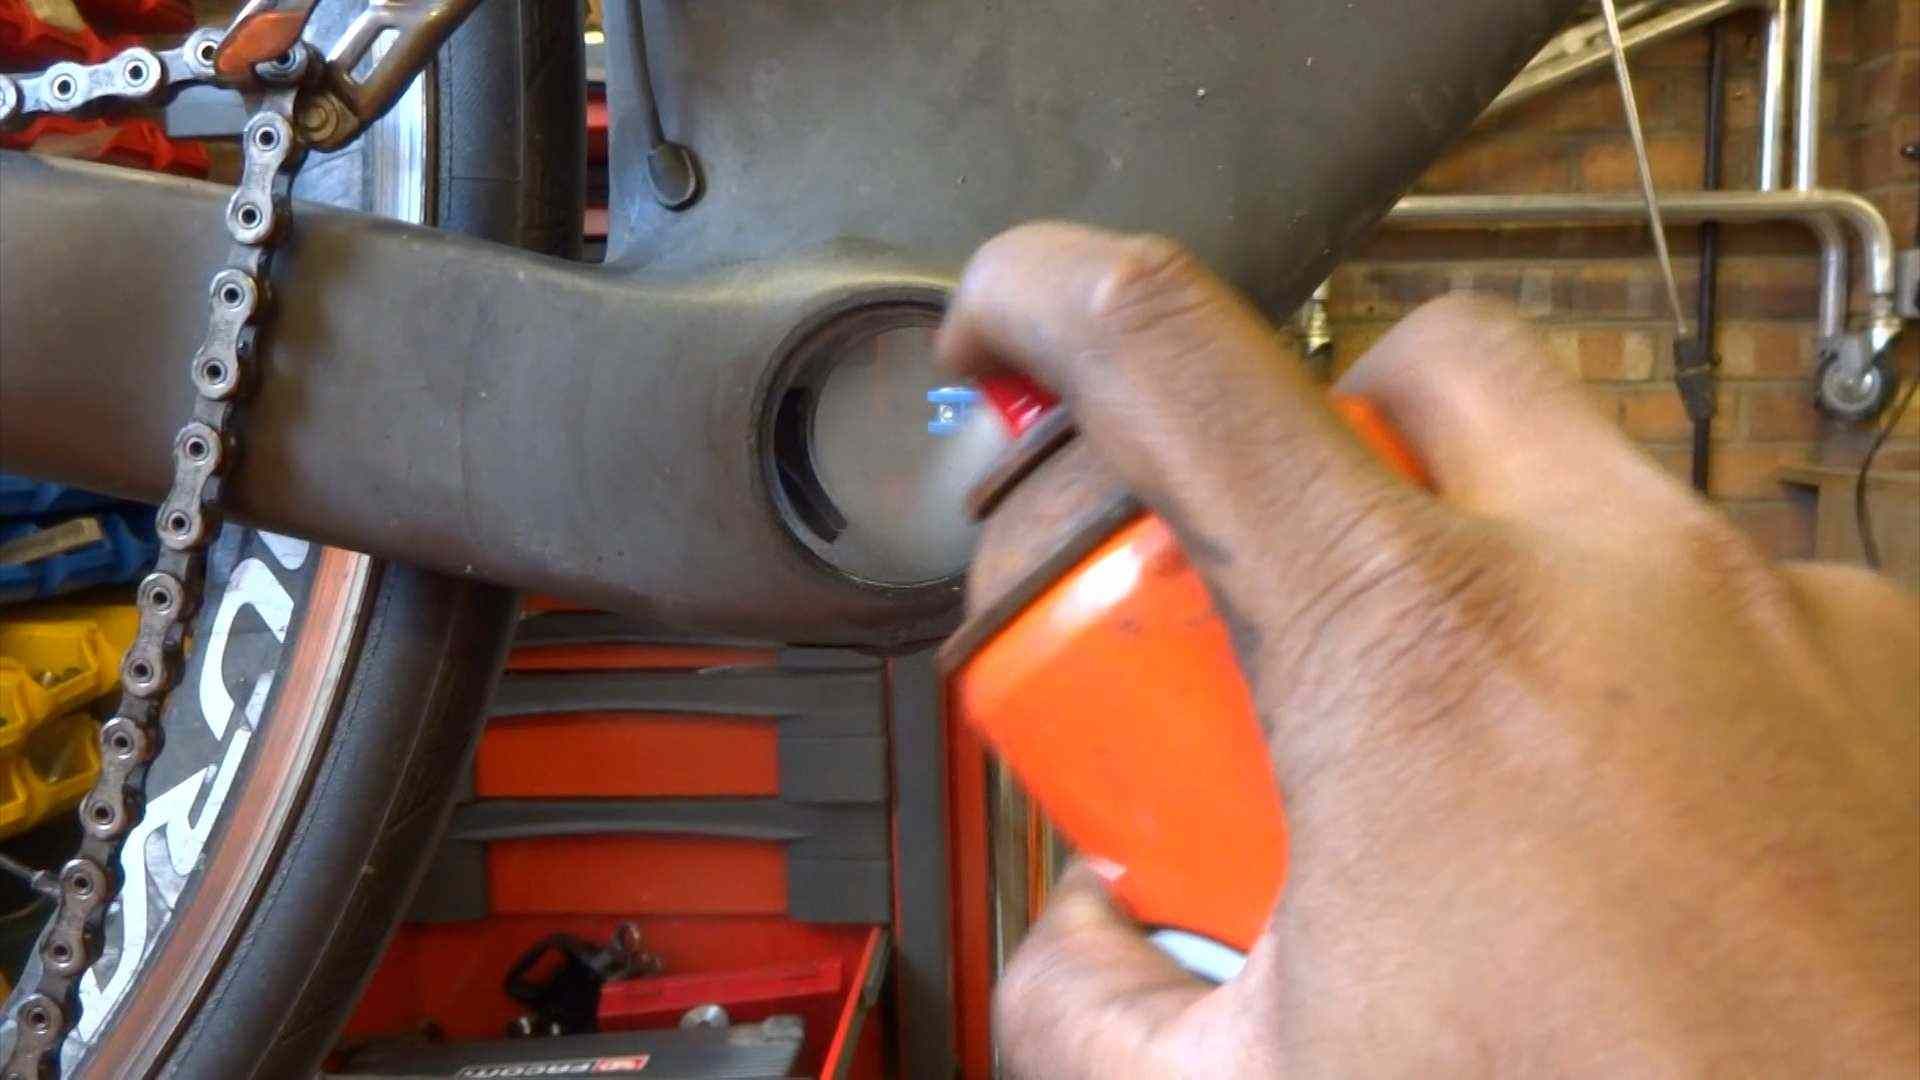
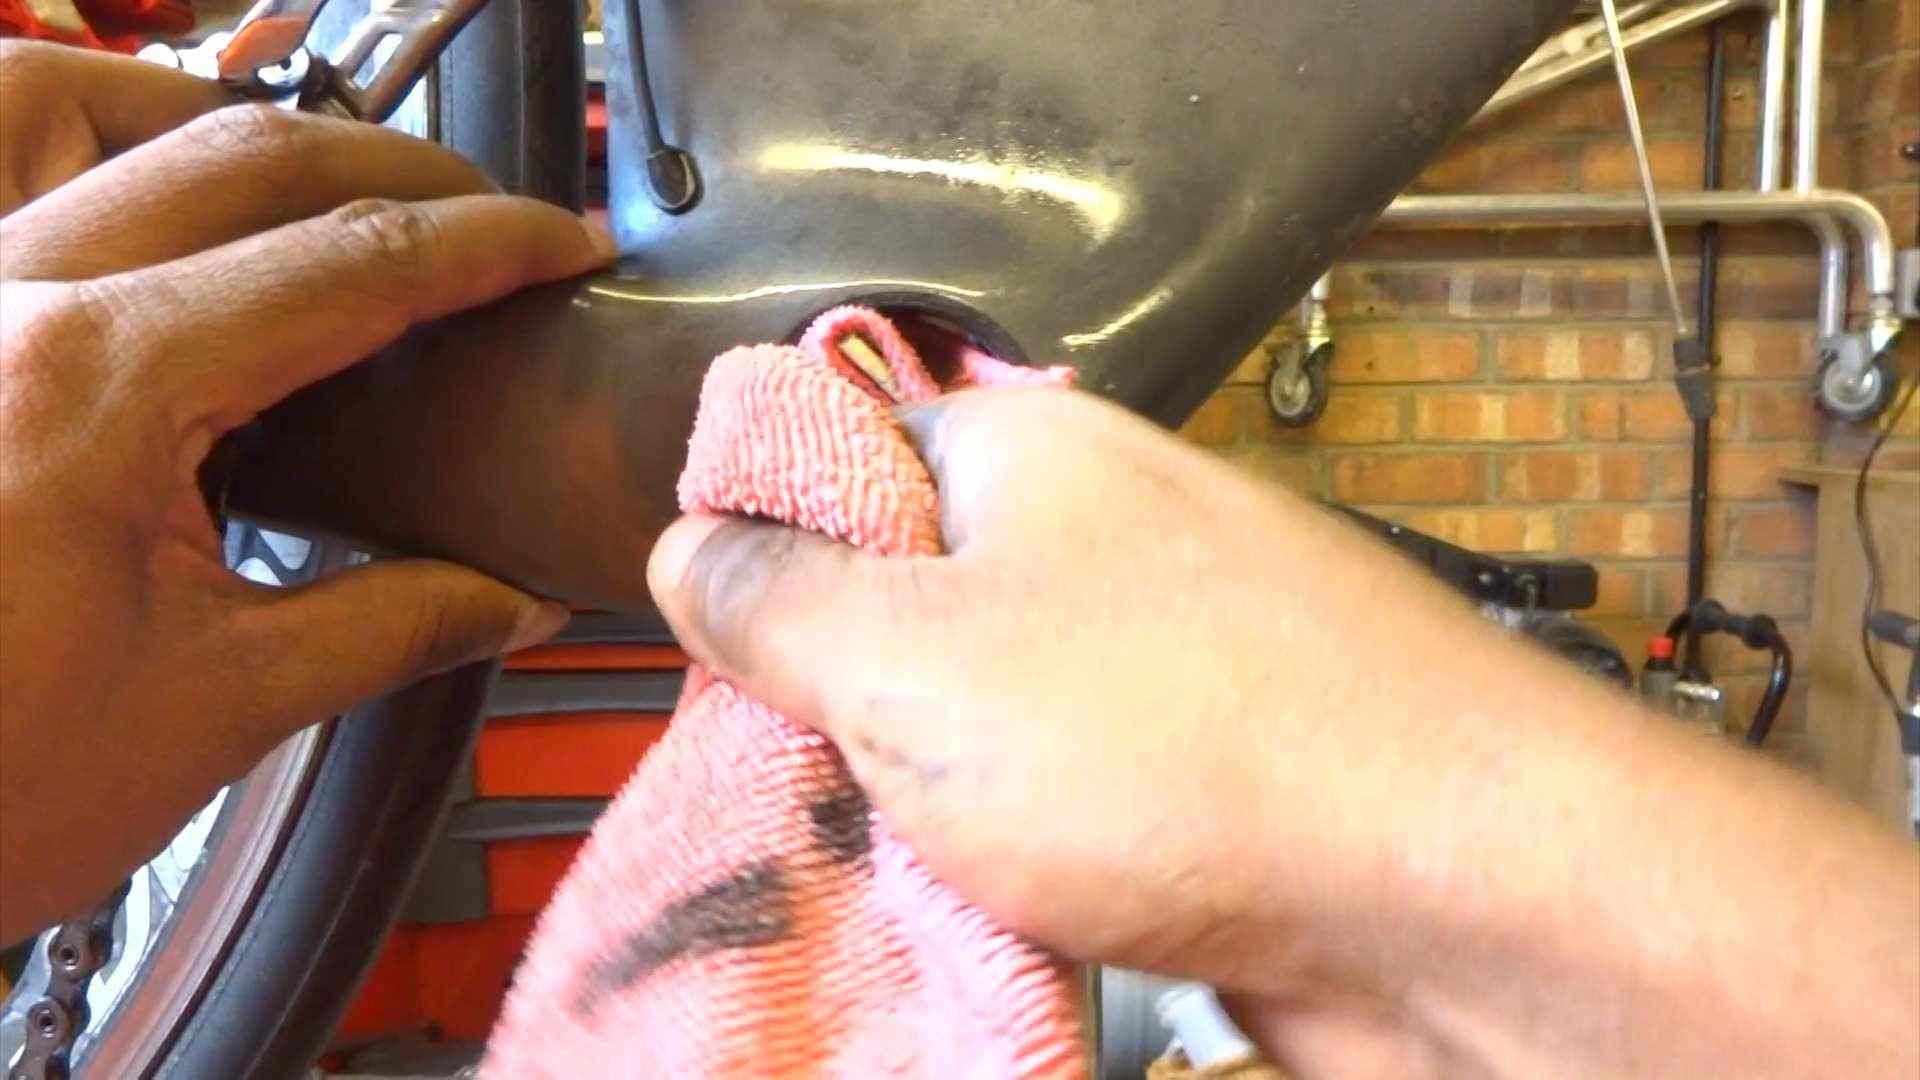
- Prepare the frame by making sure all old adhesive has been removed and the surfaces are clean. Spray with cleaner and give it a thorough wiping.
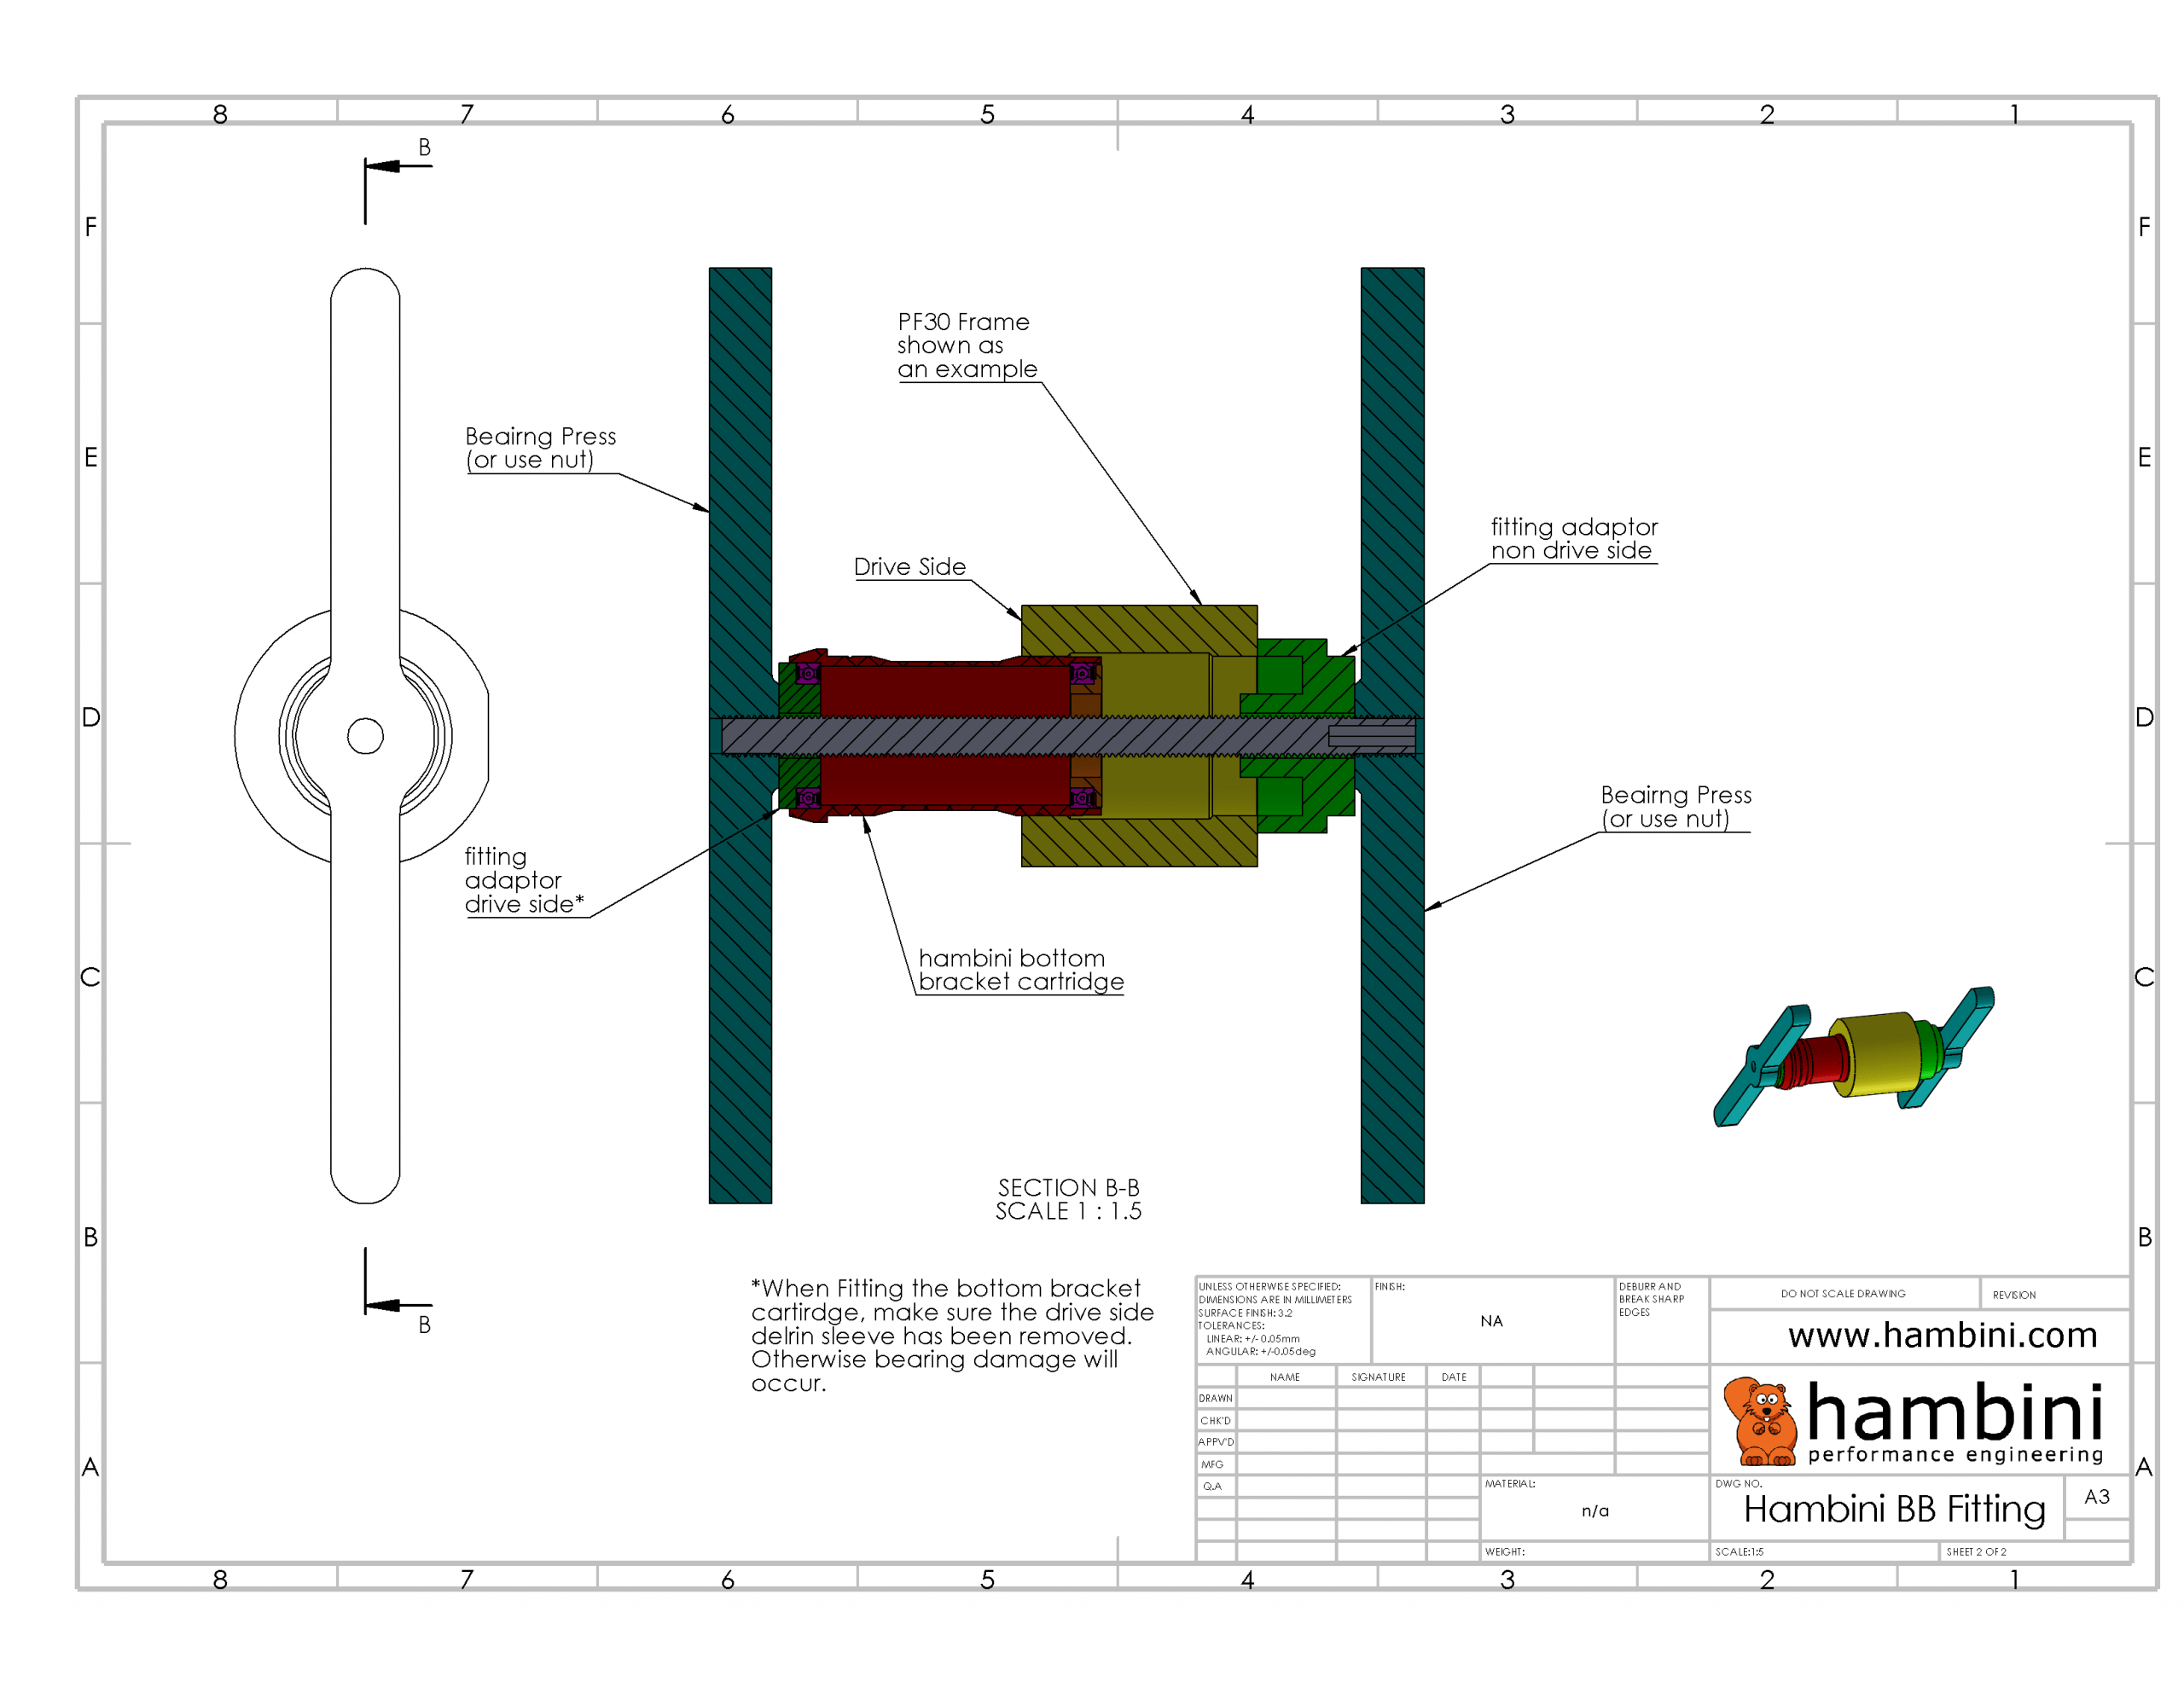
- Assemble the installation tools as shown in the drawing below. The method of insertion can be a press or M12 studbar/nuts is also acceptable, the press adaptors require at least 3mm of penny washers with a diameter of 35mm if using the studbar/nuts method or a press with a narrow head. It is very important to ensure the drive-side fitting adaptor is pressing against a bearing and not a sleeve. If a Top Hat sleeve is installed, this must be removed. On some bottom brackets (usually those designed for a 30mm axle) there is no sleeve.
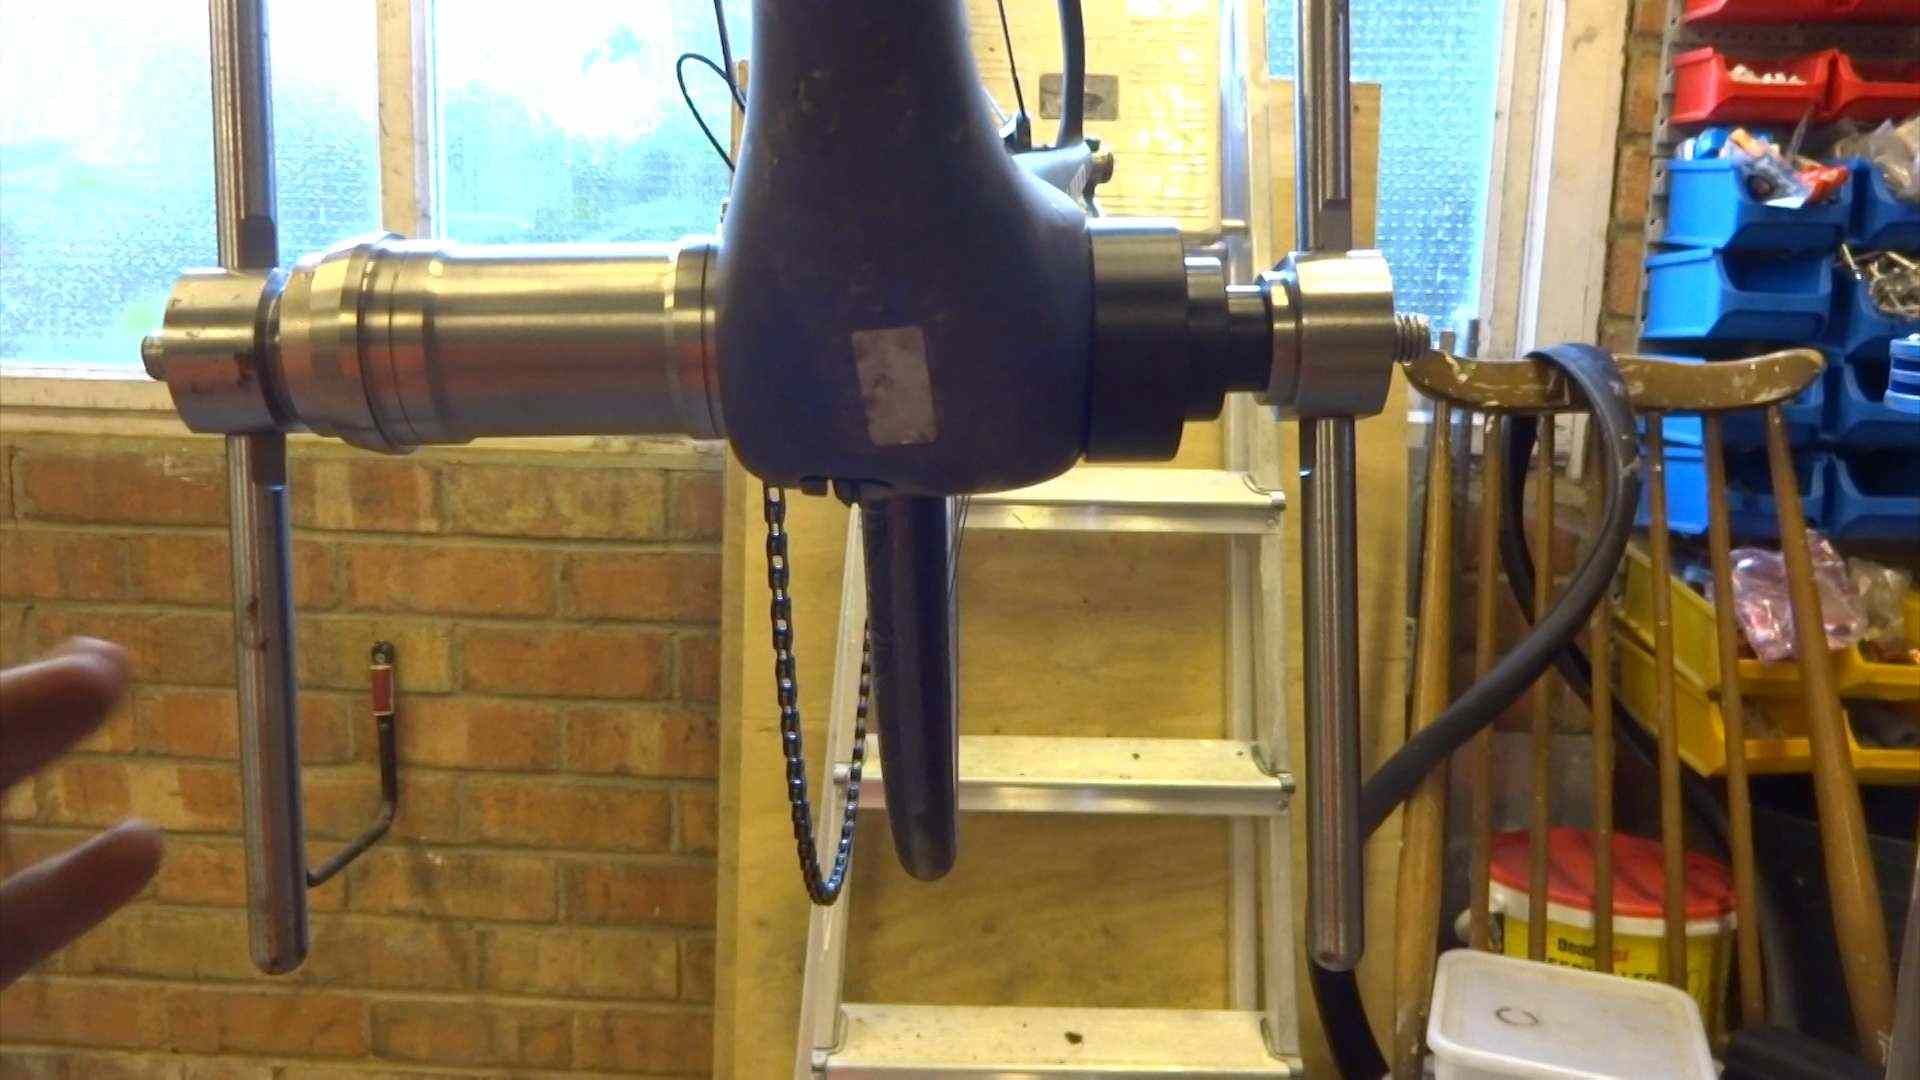
- Bottom bracket shells are often slightly tapered, the edges of the bottom bracket are tigher than the insides, when the bottom bracket gets passed the first location landing, the press will go slack (this is normal)
- During installation, there may be some creaks or popping heard (especially on carbon frames). IF THE INSTALLATION BECOMES EXCESSIVELY TIGHT, PLEASE STOP AND CONTACT ME. The bottom brackets are designed to meet published specifications, however, a lot of manufacturers make their apetures too tight or too loose
- Once the bottom bracket is ready to be pressed to locate on both landings, it is advisable to use retaining compound. On carbon frames, the use of an Activator is required otherwise the retaining compound will not stick. (Loctite activator 7649, Loctite Medium Strength retaining compound 641). On the drive side, the retaining compound can be put directly onto the bottom bracket. On the non-drive side, the retaining compound will need to be applied with a finger.
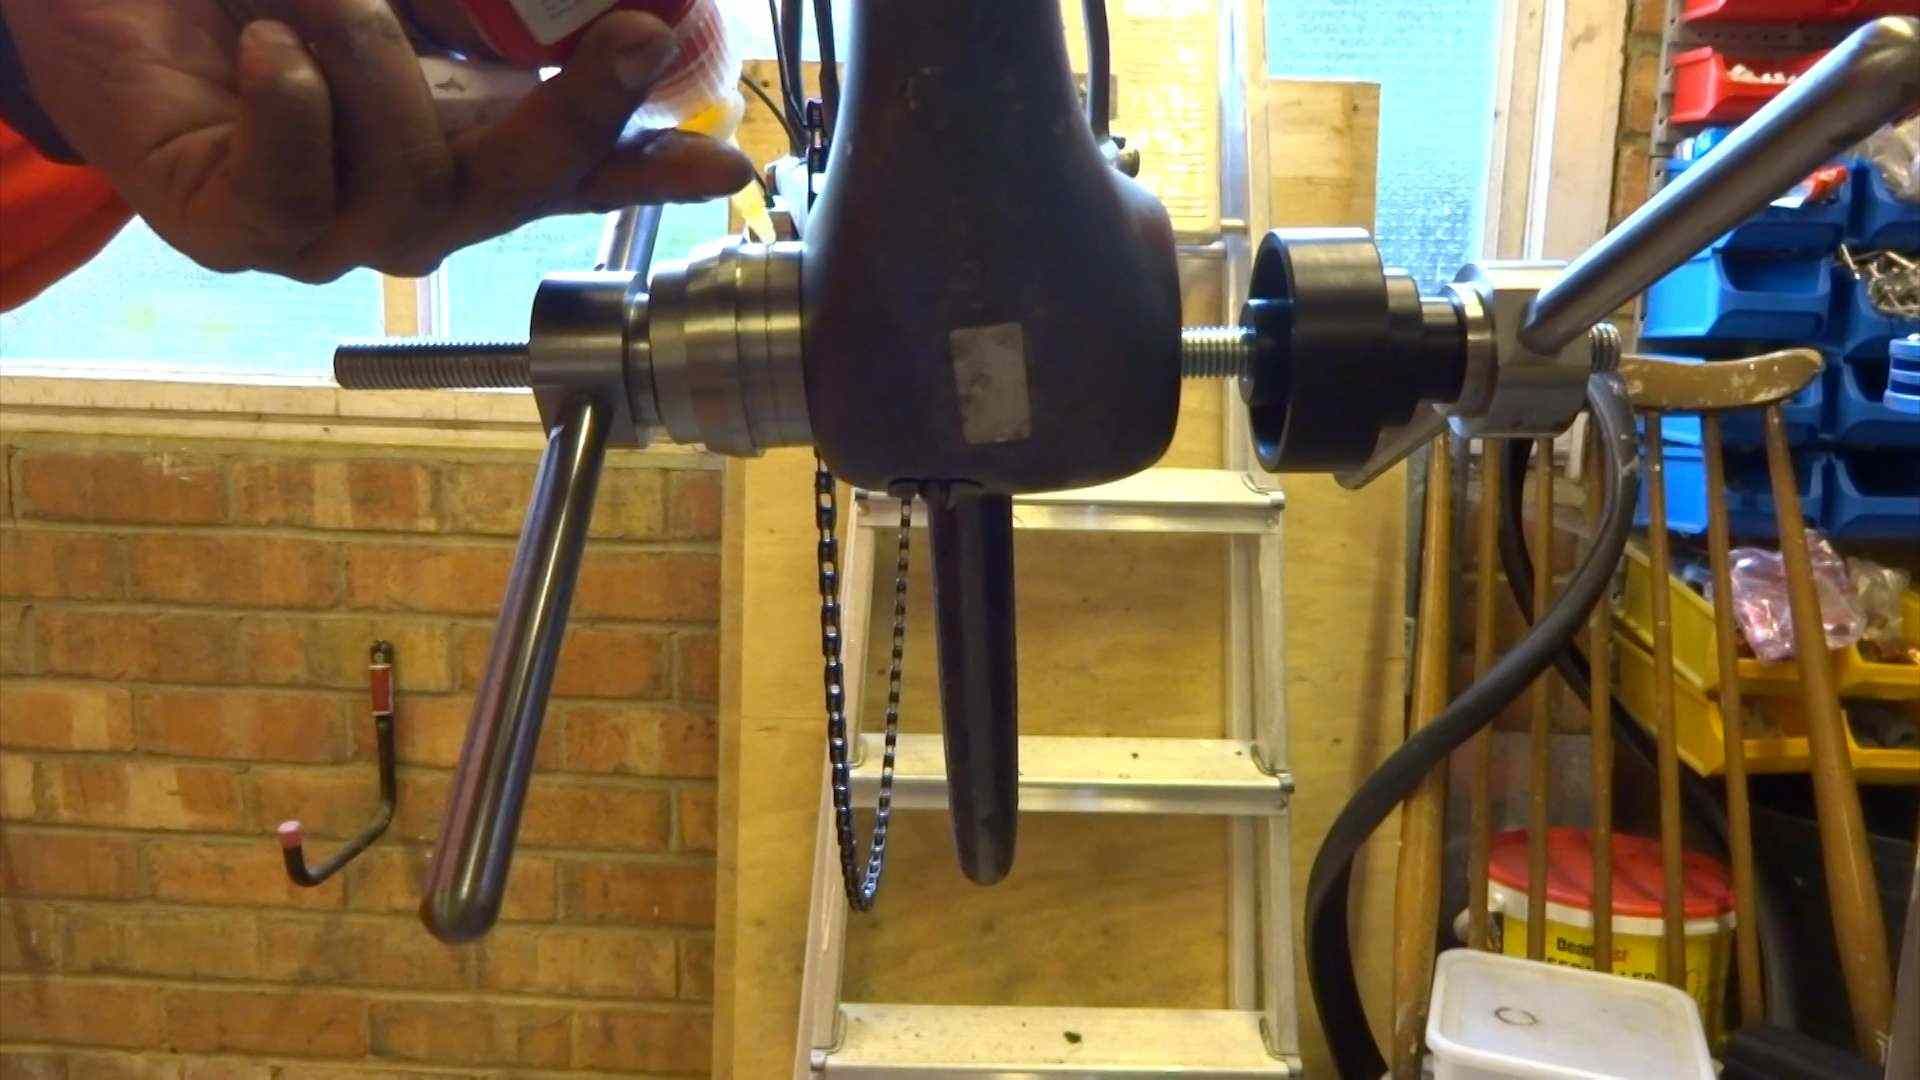
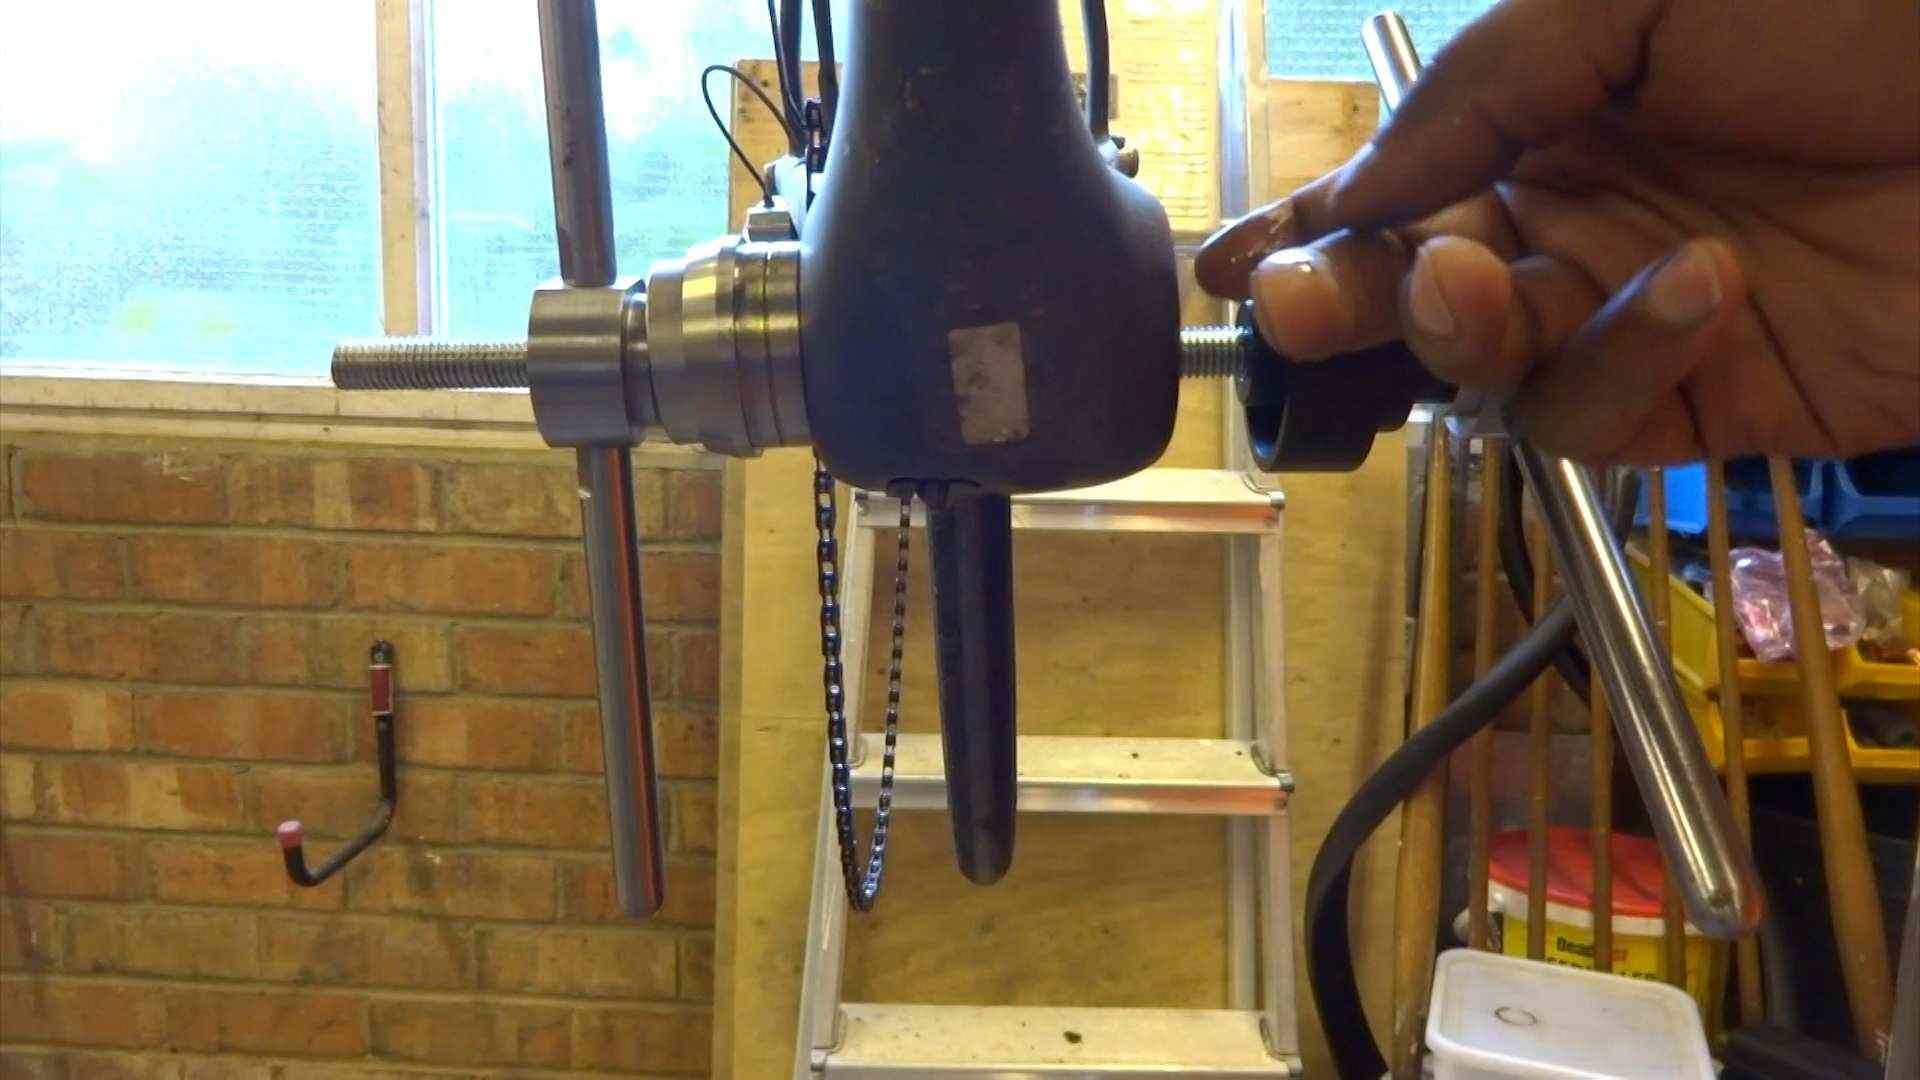
- Press the bottom bracket in until the drive side flange is flush with the bike frame. Ideally, a check with a feeler gauge should be performed but a visual inspection is usually sufficient
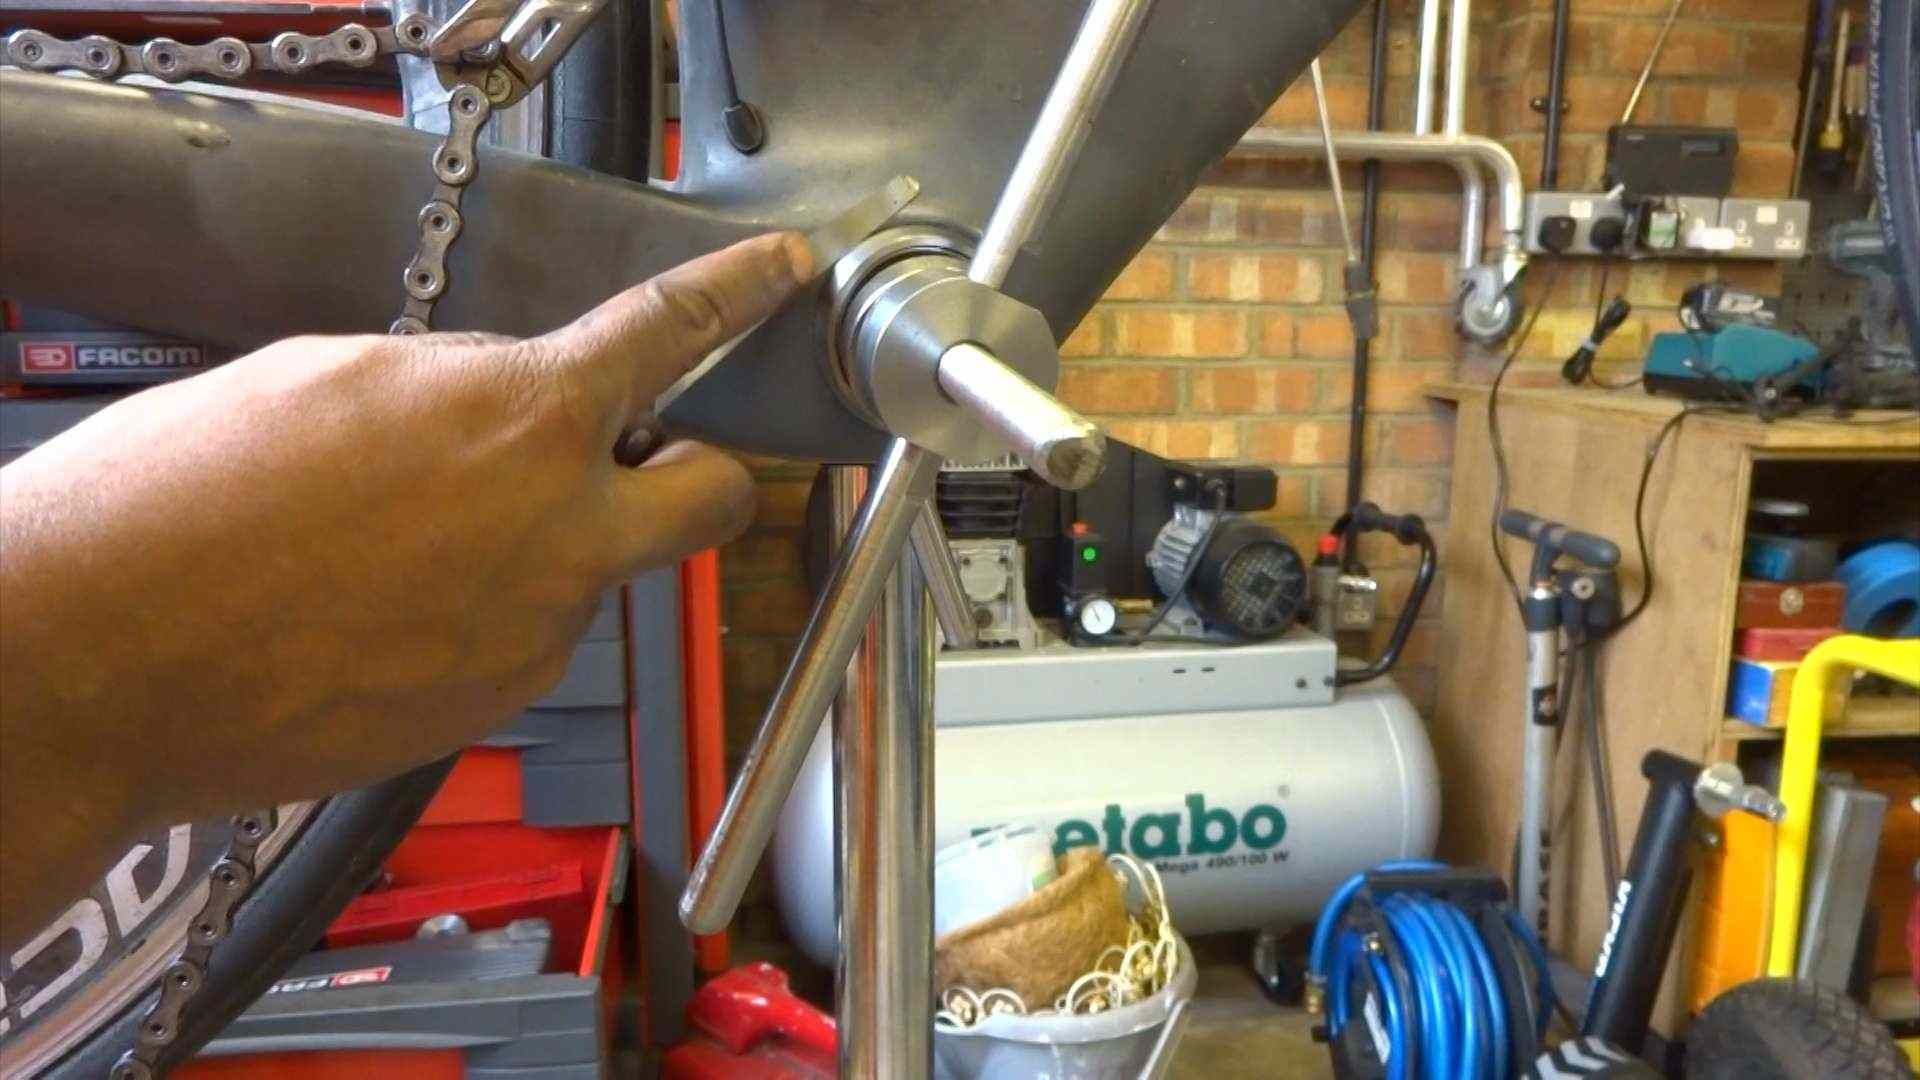
- install delrin sleeves/spacers as appropriate (application specific)
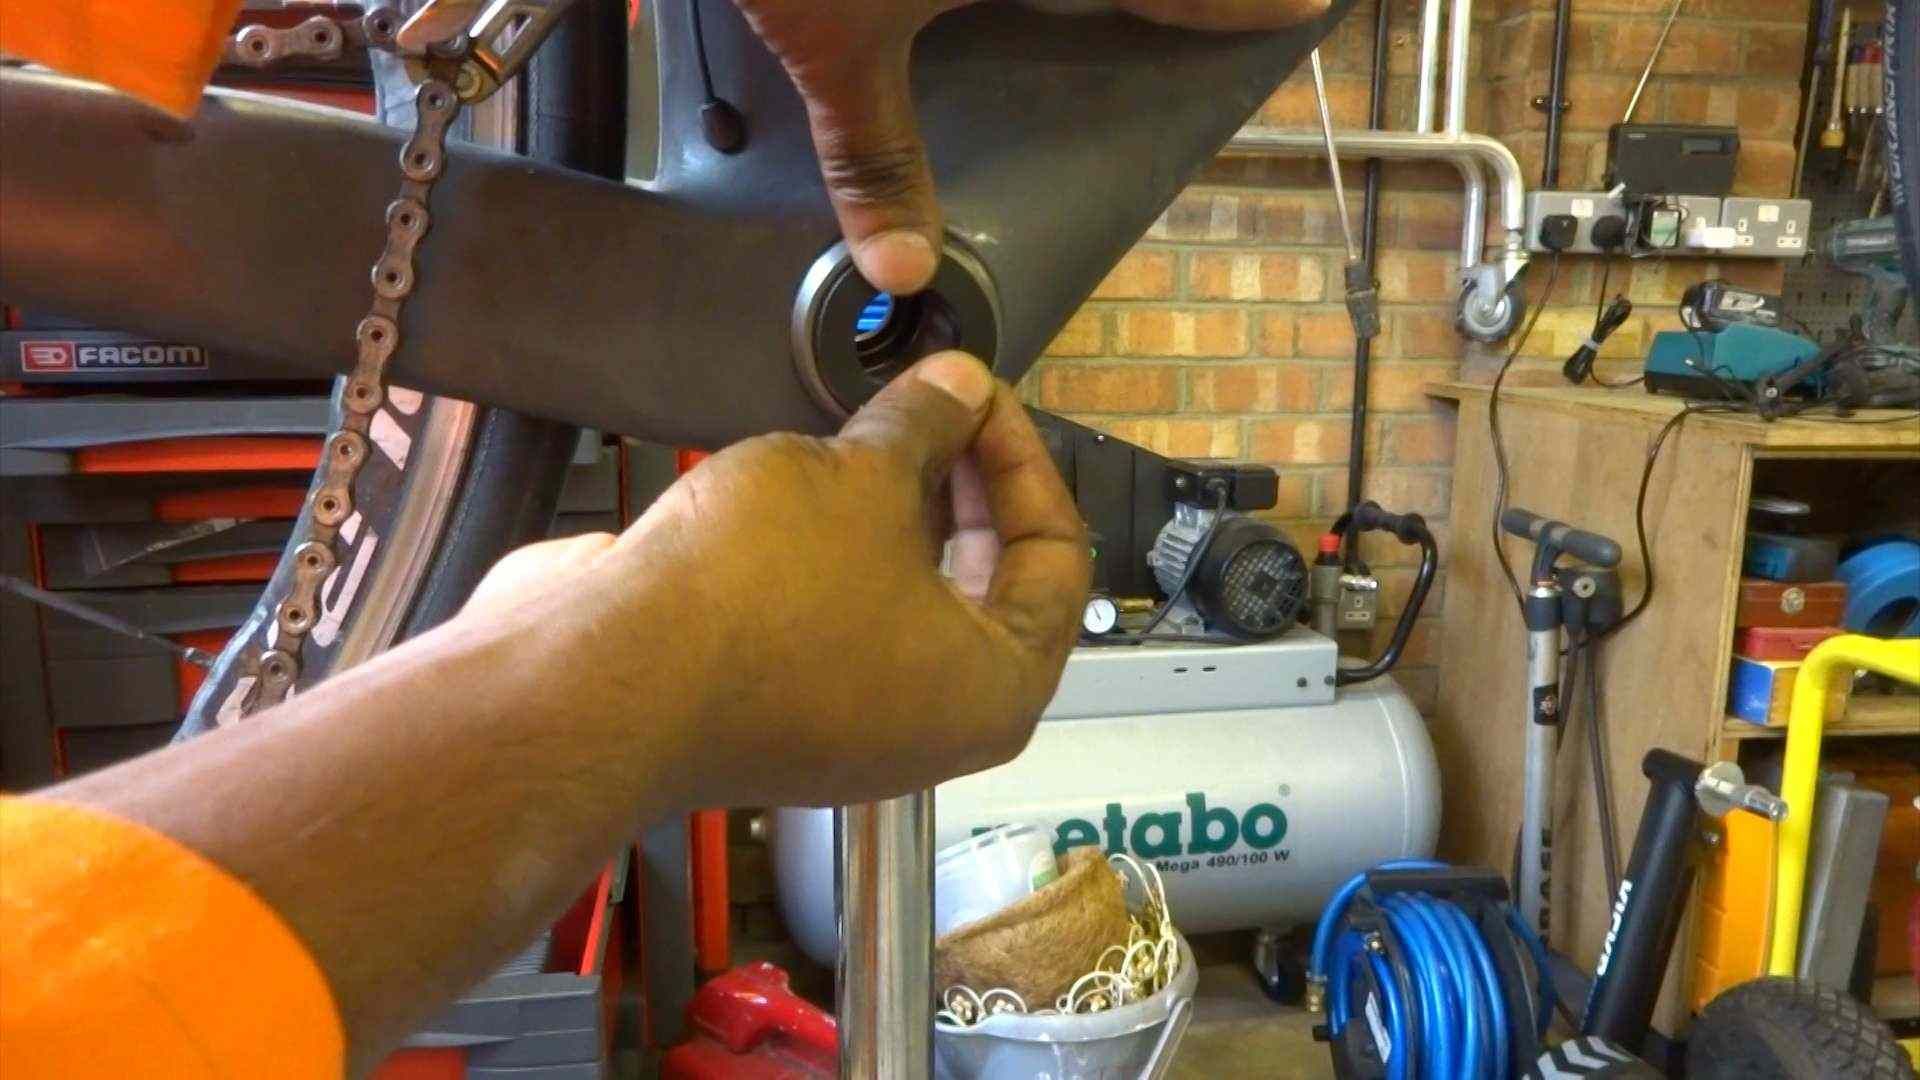
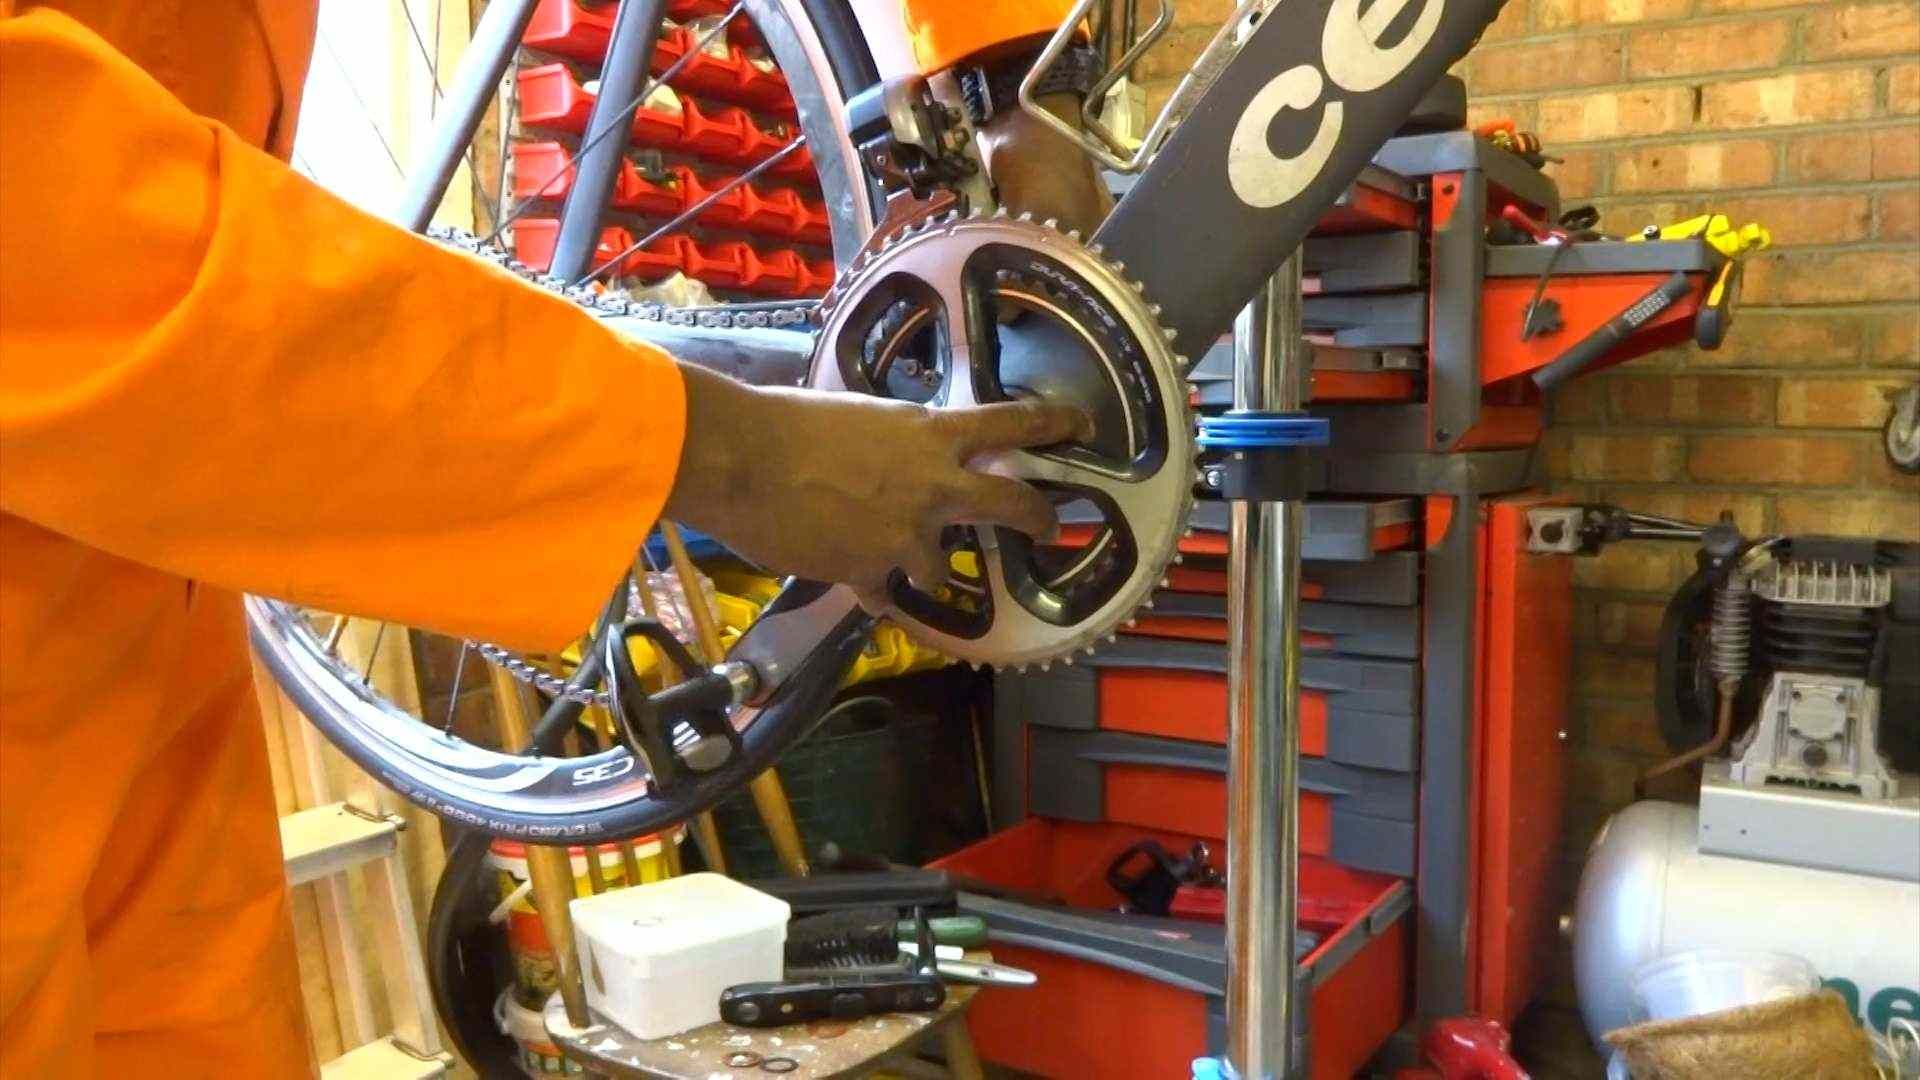
- Reinstall Crankset, this will require to refer to the instructions for your particular manufacturer and model
- **All Hambini Bottom brackets require approximately 250km of riding to bed in, they may feel slightly notchy or jittery before bedding in and this may vary from side. THIS IS NOT A FAULT** This applies to full and non contacting seals but is more noticeable on full contact seals.
Loctite activator and retaining compound require 48 hours to achieve 98% of the full cure strength, hence it is recommended that the bike is not ridden for 48 hours if any combination of activator and retaining compound has been used.
SRAM GXP Systems General Note
An Engineering guide for SRAM GXP is available here. It is recommended the user reads this information before commencing of crank installation.
SRAM GXP Systems (2020 Onwards)
SRAM GXP systems have a 24mm drive side axle diameter and a 22mm non drive side axle diameter. The non-drive side bearing is clamped between a shoulder and the non-drive side pedal arm by way of a “crank bolt”.
Hambini bottom brackets should be assembled as per SRAM instructions, the use of a wave washer on the drive side is mandatory. The wave washer is not included with the bottom bracket. The wave washer can be sourced from SRAM approved dealers, it is typically 24mm ID and 36mm OD.
A schematic showing a generalized GXP setup is shown below. The key feature is a pair of inserts on the non-drive side. One insert is on the inside of the bottom bracket, the other is on the outside.
You may need some additional 22 or 24mm spacers, SRAM axle lengths and tapers do vary. These are not included.
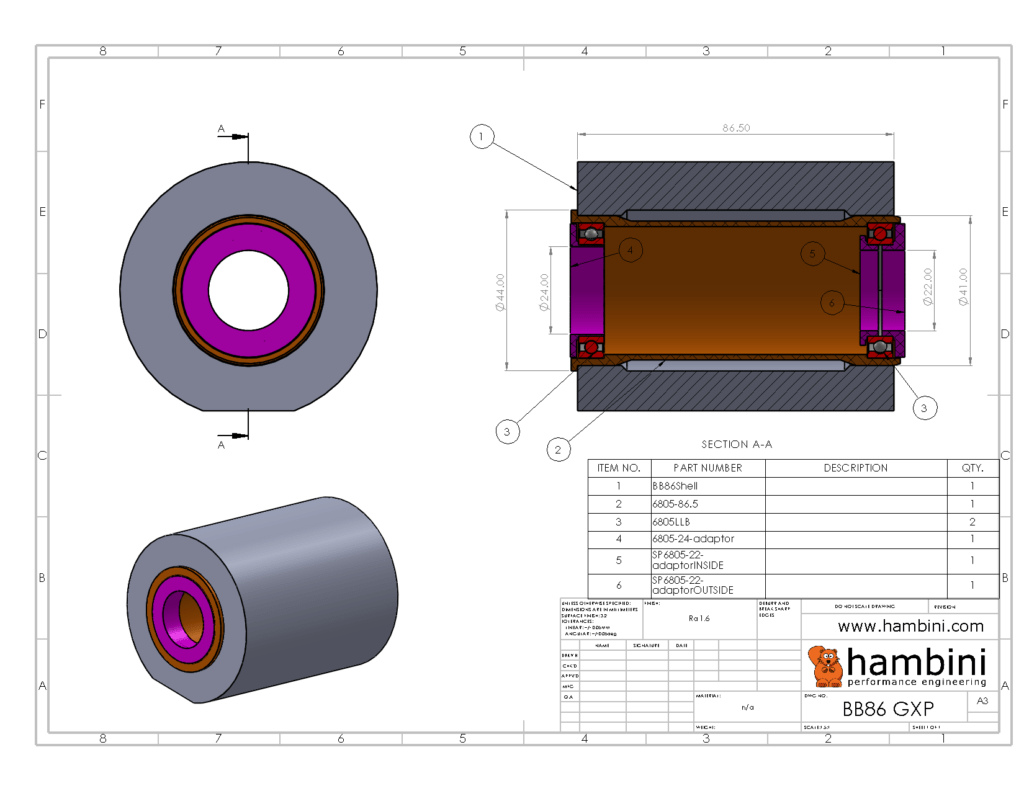
SRAM GXP Systems (Prior to 2020)
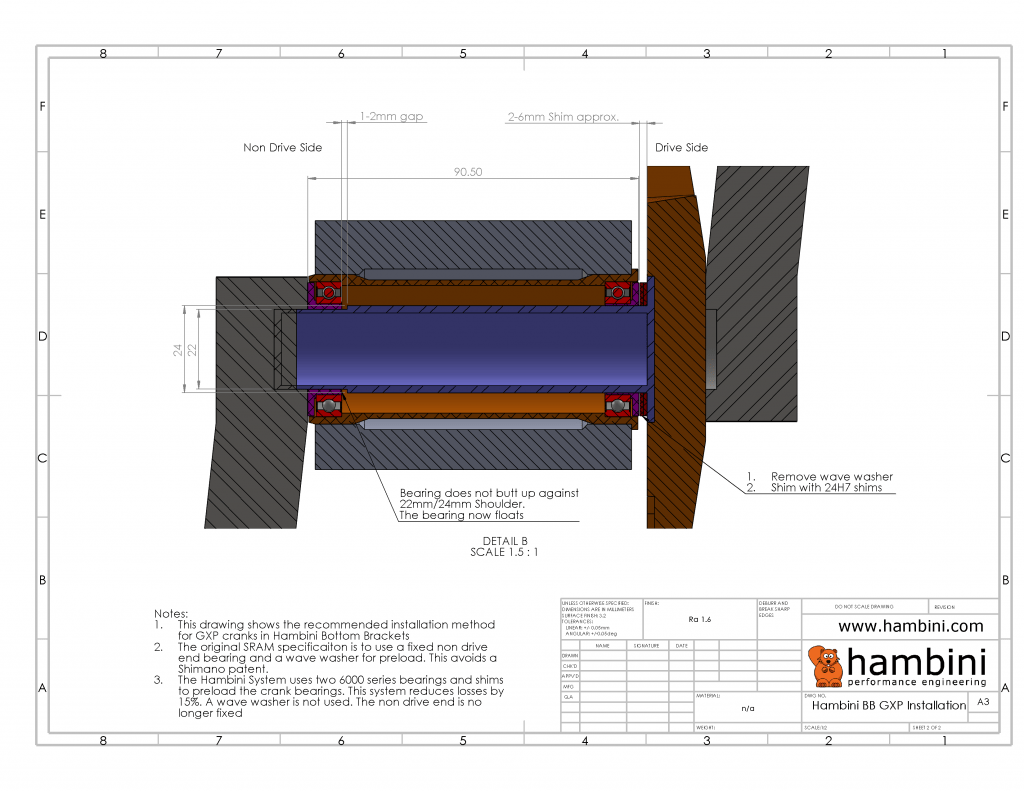
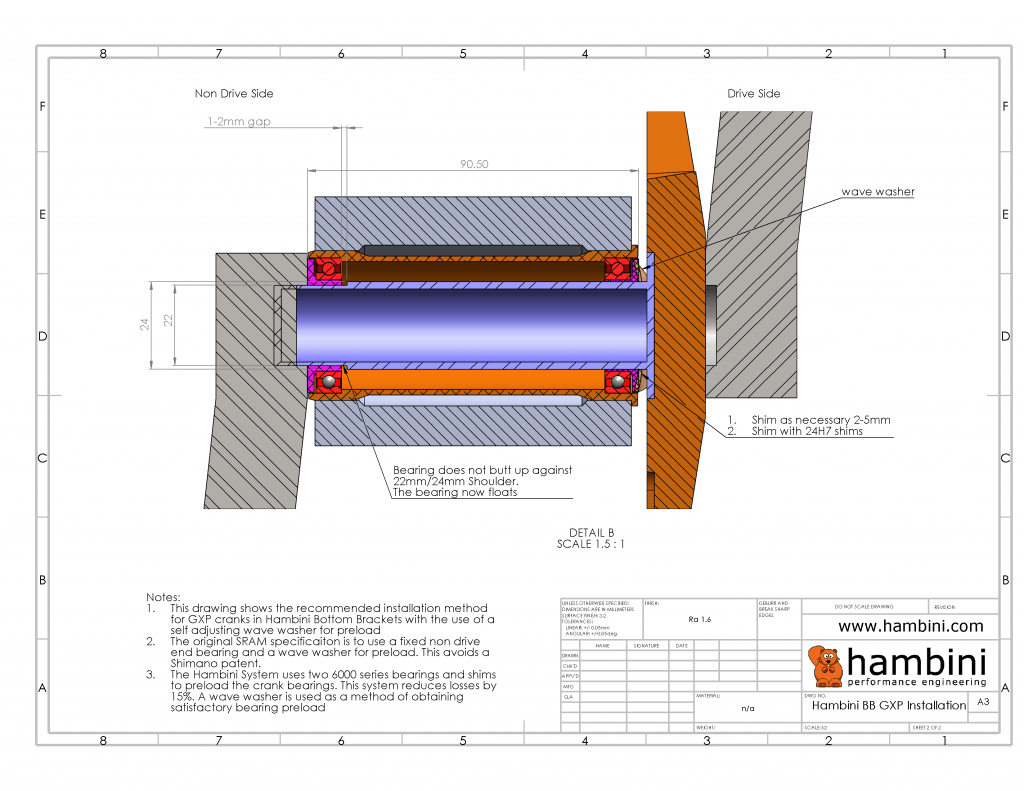
SRAM GXP – Hambini BB’s use a two bearing floating system as opposed to the OEM SRAM system of having the non-drive side bearing fixed. SRAM used a fixed Non drive End bearing to avoid a Shimano patent infringement. To allow for the floating nature, Hambini BB’s require preload to be adjusted by shimming. The crankset should be installed so there is just enough tightness on the crank axle bolt to prevent any play. Overtightening will destroy the bearings. Two methods of installing a Hambini BB in GXP systems are shown below. The first does not use a wave washer and is the preferred method used by a number of racing teams. This does require more frequent maintenance as the preload shims have to be adjusted as the bearing clearance increases. The second method functions like most standard bottom bracket/crankset combinations, both bearings are restrained in one direction, and preload is by means of a wave washer. Please note Hambini GXP Bottom Brackets ARE NOT SUPPLIED WITH A WAVE WASHER
SRAM DUB
SRAM DUB axles are 28.99mm, for all intents and purposes these are actually 29mm but for patent issues, it’s 28.99mm.
Practically, SRAM axles vary in length between crank arms. Hambini Bottom Brackets are made to conform to the bottom end of the tolerance and may require additional 29mm shims. For the end user, it is much easier to add a few shims than potentially having to machine the bottom bracket.
Additional Shims are available from Hambini and a number of other sources. It should be pointed out that you may not need them, it is totally dependent on the distance between the crank arms of your particular crankset.
Additional Information is available here
Troubleshooting Tight and Gritty bottom Brackets (Whiffling)
The most common issue is bearings that feel excessively gritty when the bottom bracket is installed – Some of this is because they are not bedded in but excessive grittiness is caused by a fit problem, Usually, the frame being undersized.
The ideal method of fixing this is to use a boring machine, this can be expensive. An alternative is to use a whiffler to enlarge the hole. The procedure for improving the fit is detailed here.
If you have any further questions, please use the contact form
